I’m not much of a cook. I used to cook, because I had to. But then I married Mr. B. He actually enjoys cooking and he’s much, much better at it than I am. So the cooking gradually became his domain. I clean up. The division of labor works.
And while I don’t cook (well, much), I do bake. Our Christmases are filled with julekake (Norwegian Christmas bread). I also make English toffee. Toffee is one of those things where, if you can make it, people look at you like you just got your Hogwarts letter. You’re a Wizard, Harry! They assume it requires candy thermometers and maybe some eye of newt.
In fact, toffee isn’t that complicated. It requires no special equipment. The ingredients are dead simple. I don’t even require a recipe, because it’s in my head. So here’s the contents of my head, in case you want to make it.
Ingredients:
1 cup sugar
1 cup salted butter (if you only have unsalted, you can add 1/2 teaspoon of salt)
1 cup semisweet tollhouse morsels
1 cup (getting the idea?) chopped walnuts
Equipment:
1 heavy-bottomed, medium size saucepan
1 metal spoon with a long handle
1 double-boiler or equivalent (I use a dollar store metal bowl over a smaller saucepan with about an inch of water in the bottom)
1 crappy 9×13 brownie pan (seriously, if you have a really good-quality, sturdy one, go out and get a cheapo from the grocery store or something. You want it to be fairly flimsy)
1 spatula
1 cold day. Unless you want your electricity bill to spike through the roof.
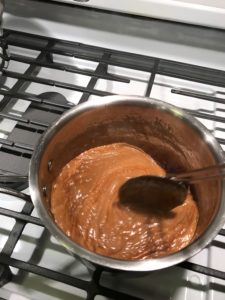
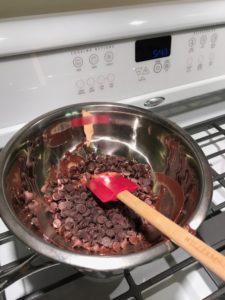 Put the chocolate on to melt. You’re going to want to put it on very low heat (yes, there is a pot with about an inch of water underneath that bowl). If the water goes dry, you will end up with burned chocolate – no good!
Next, start to melt the butter in your medium saucepan over medium-high heat. I usually use the bowl of the spoon to carve the butter up into pieces so it will melt faster. Once the bulk of the butter has melted, add all the sugar. And settle in. You are going to want to keep this moving the entire time until you have toffee. This takes between 15 minutes and forever (no, really – it takes about 15-20 minutes, I think. I don’t time it. I just stir until it’s done). It’s going to start out looking like grainy melted butter, then it’s going to morph a few times. The first time (maybe the first few times) you do this, you will be positive you’re getting it all wrong. Because it gets seriously weird.
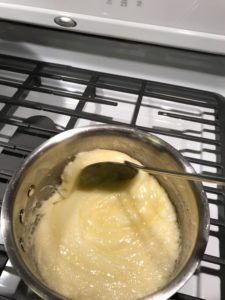 Here’s the first weird stage: It gets white-ish and fluffy, and frankly…it looks like snot. Soldier onward. Keep stirring. And make sure you’re getting the spoon into the corners of the saucepan so nothing is collecting there and burning!
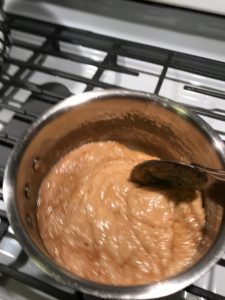 There’s another stage it gets to at times where it looks rather like brains being braised in butter (yummy, huh?). If it gets like this, lower the heat a TRIFLE (very minute adjustment) and stir faster to reincorporate the butter. Sometimes this stage is skipped. I think it has to do with too much heat, but what do I know? I’m not Alton Brown.
Apologies for the crappy pictures. Turns out it’s hard to stir vigorously and snap a coherent photo at the same time. Who knew?
 You will get to a point where you are SURE you’re done. It will be a light golden brown. It’s not quite there yet. You want it to be dark brown, maybe just the barest whiff away from starting to burn a little. If you have forethought, put a ramekin of cold water next to the stove, lift the pot off the heat, and drizzle a little of the mixture into the cold water (then set the pot down on the heat and keep stirring). The drizzle of toffee will set almost immediately and you can test it. It should set up nice and hard with a good snap.
If you’re me, you’ve been doing this for 30 years and know what you’re looking for, thank goodness, because you always forget to set up the ramekin with water and trust me, you do not want to stop stirring this stuff, not for a single minute, not even to step across the kitchen, fetch a ramekin and put water in it.
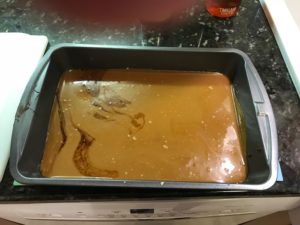 Pour the hot mixture (WARNING: THIS IS BURN TERRITORY. AND STICKY AS ALL GET OUT. DO NOT TOUCH THE TOFFEE AT THIS STAGE) into your crappy pan and tilt it about to get the liquid toffee more or less level.
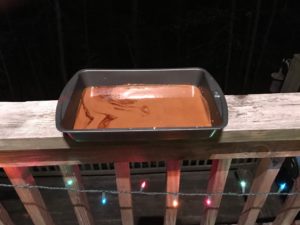
Put it outside to begin to set (putting this in the fridge will not make you a happy electricity customer, hence the requirement for a cold day).
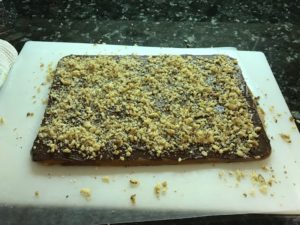
When it has sat in the cold for a few minutes (depending on how cold it is outside), test its hardness. It should show a fingerprint, but without denting. If you try to spread the 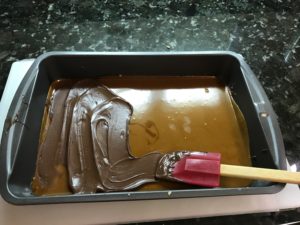 chocolate on while it is still soft, you will have difficulties. The chocolate isn’t a ganache, so it spreads thickly. You want the toffee to be hard enough to stand up to the chocolate being shoved around on its surface. Spread half the melted chocolate until it’s more or less even. Then sprinkle half the chopped nuts. Set it outside again for a few more minutes. The chocolate doesn’t have to be completely set when you bring it back in again to do the other side, but it should be at least a little set. Invert the pan over some waxed paper and eject the toffee (this is why you want a
 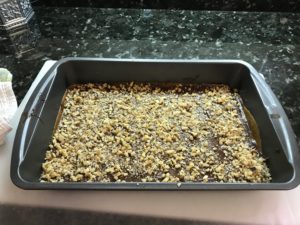 crappy pan – you want to be able to push on the bottom or torque the pan a little in order to get the toffee to release. And no, you don’t need to butter or otherwise treat the pan.)
If the toffee has broken up a bit, puzzle it back together as best you can (that makes chocolate spreading easier). Repeat the spreading of the chocolate and the nuts. Allow to cool. Break up with a chef’s knife and store in a cool, dry place (I use cookie tins lined with waxed paper). It keeps for quite a while. Also, save the crumbs to serve over ice cream.
Happy (yummy) holidays! You’re a wizard, Harry!